

Supplies Needed:
- Light Yellow Basis Cardstock, cut to 8 ½ x 8 ½
- Coordinating patterned paper, cut to 4 pieces each 2 ¼ x 2 ¼, and 2 pieces each 2 ¼ x 3 ¼
- Light Yellow Basis Cardstock, strip cut to 1 ½ x 8 ½
- Coordinating patterned paper, strip cut to 1 x 8 ½
- Favorite adhesives, one needs to be extra strong to keep the basket assembled
- Scoring tool and scissors
- Paper piercer and two brads
- Goodies to fill your basket with

Steps:
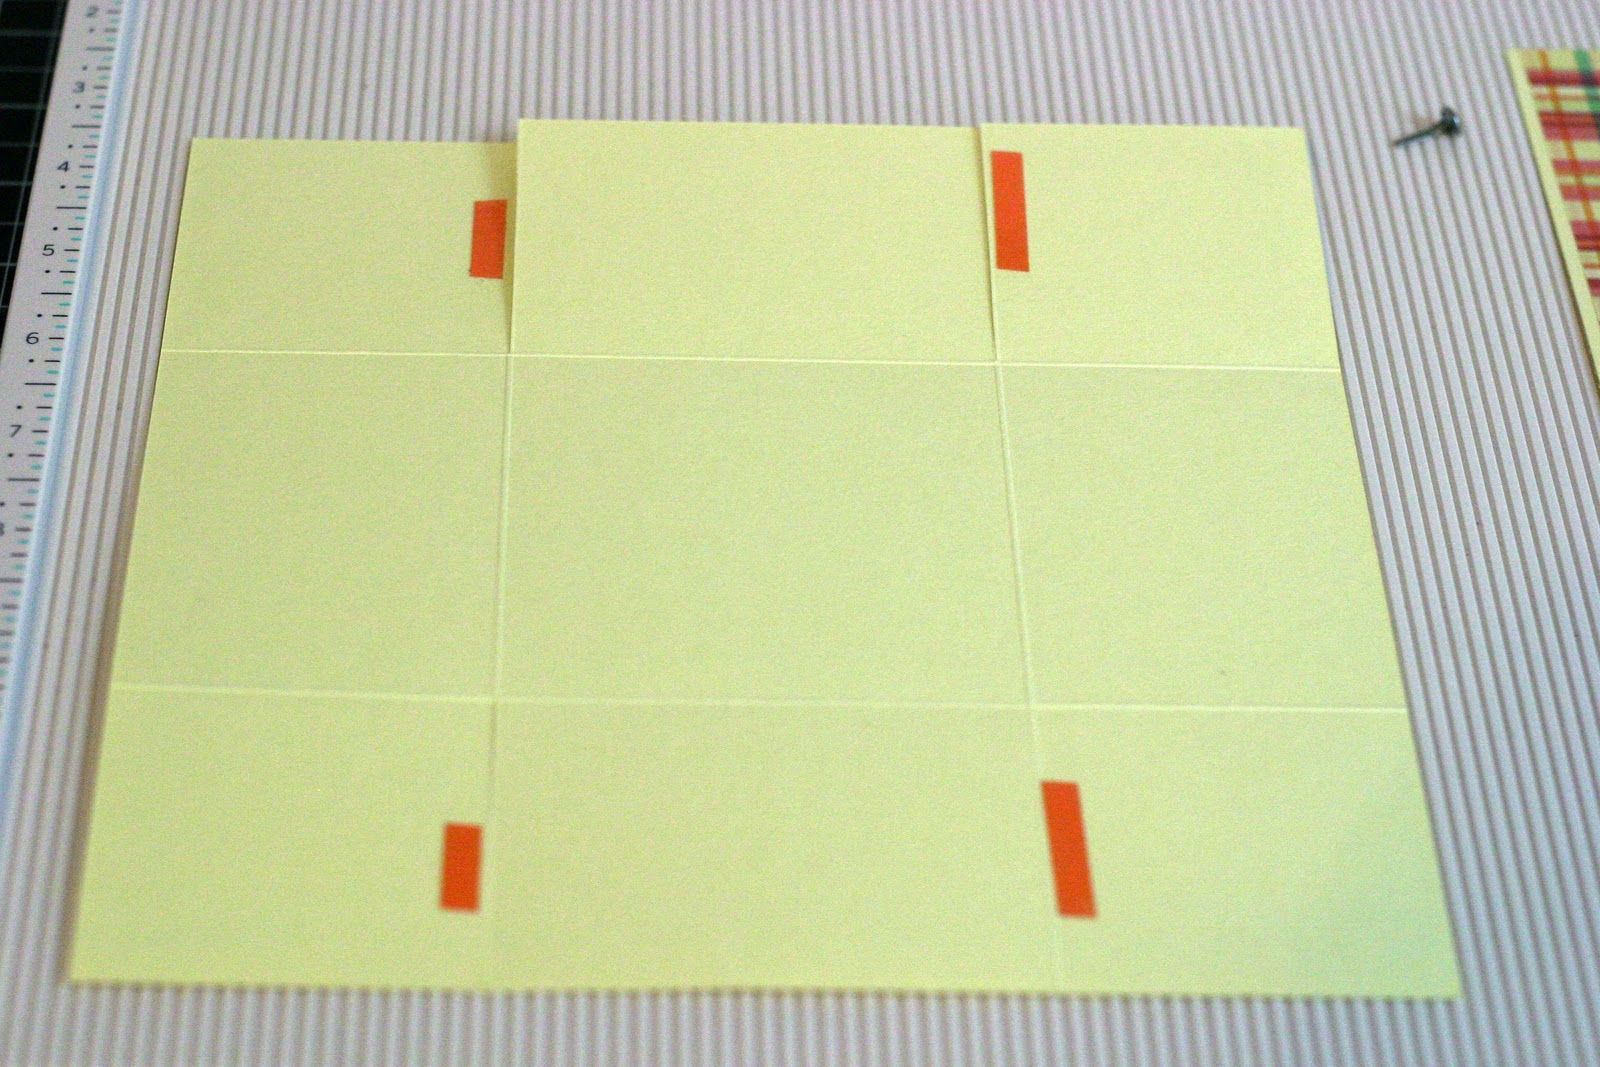
Score the 8 ½ x 8 ½ Basis cardstock at 2 ½” on each side. This creates a grid on your cardstock. Cut in to the first score line on both bottom and top sides to create the flaps.

Adhere down the patterned paper on the four corners and the large center sides.

Create your basket handle by gluing the patterned paper strip to the cardstock strip.
Add little pieces of the strong adhesive on the inside edges of the flaps. This will add extra holding power to your basket.

Flip your cardstock over and fold to assemble your basket. When you gather the two sides to meet at a point on top, press down on the strong adhesive to make good contact. Tuck in one end of the basket handle. Hold them all together and pierce a hole through all the layers. Add a brad to keep all the layers together and create the basket shape. Repeat on the other side of the basket.


Now the hardest part of the project…. What goodies are your going to fill your darling basket with?


What a great tutorial and little basket thanks for sharing it.
ReplyDeleteJust a quick note to let you know that a link to this post will be placed on CraftCrave today [24 Mar 01:00am GMT]. Thanks, Maria
ReplyDeleteYour basket is adorable! Thank you for the tutorial!
ReplyDelete