Hello there! Lovely to see you again! Thanks for joining me today at CutCardStock.com blog. It's Kristie here, and I am ecstatic to be joining CCS for another term on the Design Team. Thank you so much for having me! Today I wanted to share with you a green card to get your March started out right!
Being in Singapore, we don't celebrate Saint Patrick's Day or even the birth of Spring since it is always. the. same. weather here. So I wanted to create a card that was green and festive but also versatile in its occasion. You really could do this card in ANY color. Imagine a baby card, or Christmas, Fall, you name it... sky is the limit!
I'm excited that we get to showcase the Curious Metallic card stock, because honestly its one of my favourites. I love looking through the sheets of shimmery paper. They are just gorgeous! It's kind of hard to cut into them to be honest, but some how I managed. They are nice and thick and great for card bases too. Today I used just a bit of the darker green (botanic) and the lime green and I also used an A7 sized pre folded card and envelope (in bright green).
I started by measuring out my pre-folded card. I calculated how many squares would fit across and down the base. It worked out nicely with 4 across and three down but I had to trim the extra card base that was left over. So I trimmed that off first.
I then trimmed out my squares to be a little bit bigger than 1.5 inches. When I calculated 4 squares into 7 inches, it came back as 1.666666 (into infinity!) So on my paper trimmer I measured the next big line past the half inch mark and called it close enough.
I then eyeballed cutting them into triangles. If you want to do this by hand, my words of advise are to line up the scissors from point to point BEFORE cutting. I closed one eye while I did it to be sure it was accurate. Otherwise you will end up with one side of your triangle cut crooked. Usually a good rule of thumb when cutting things is to look where you are going, not where you are. It helps your brain stay on track and things are much straighter.
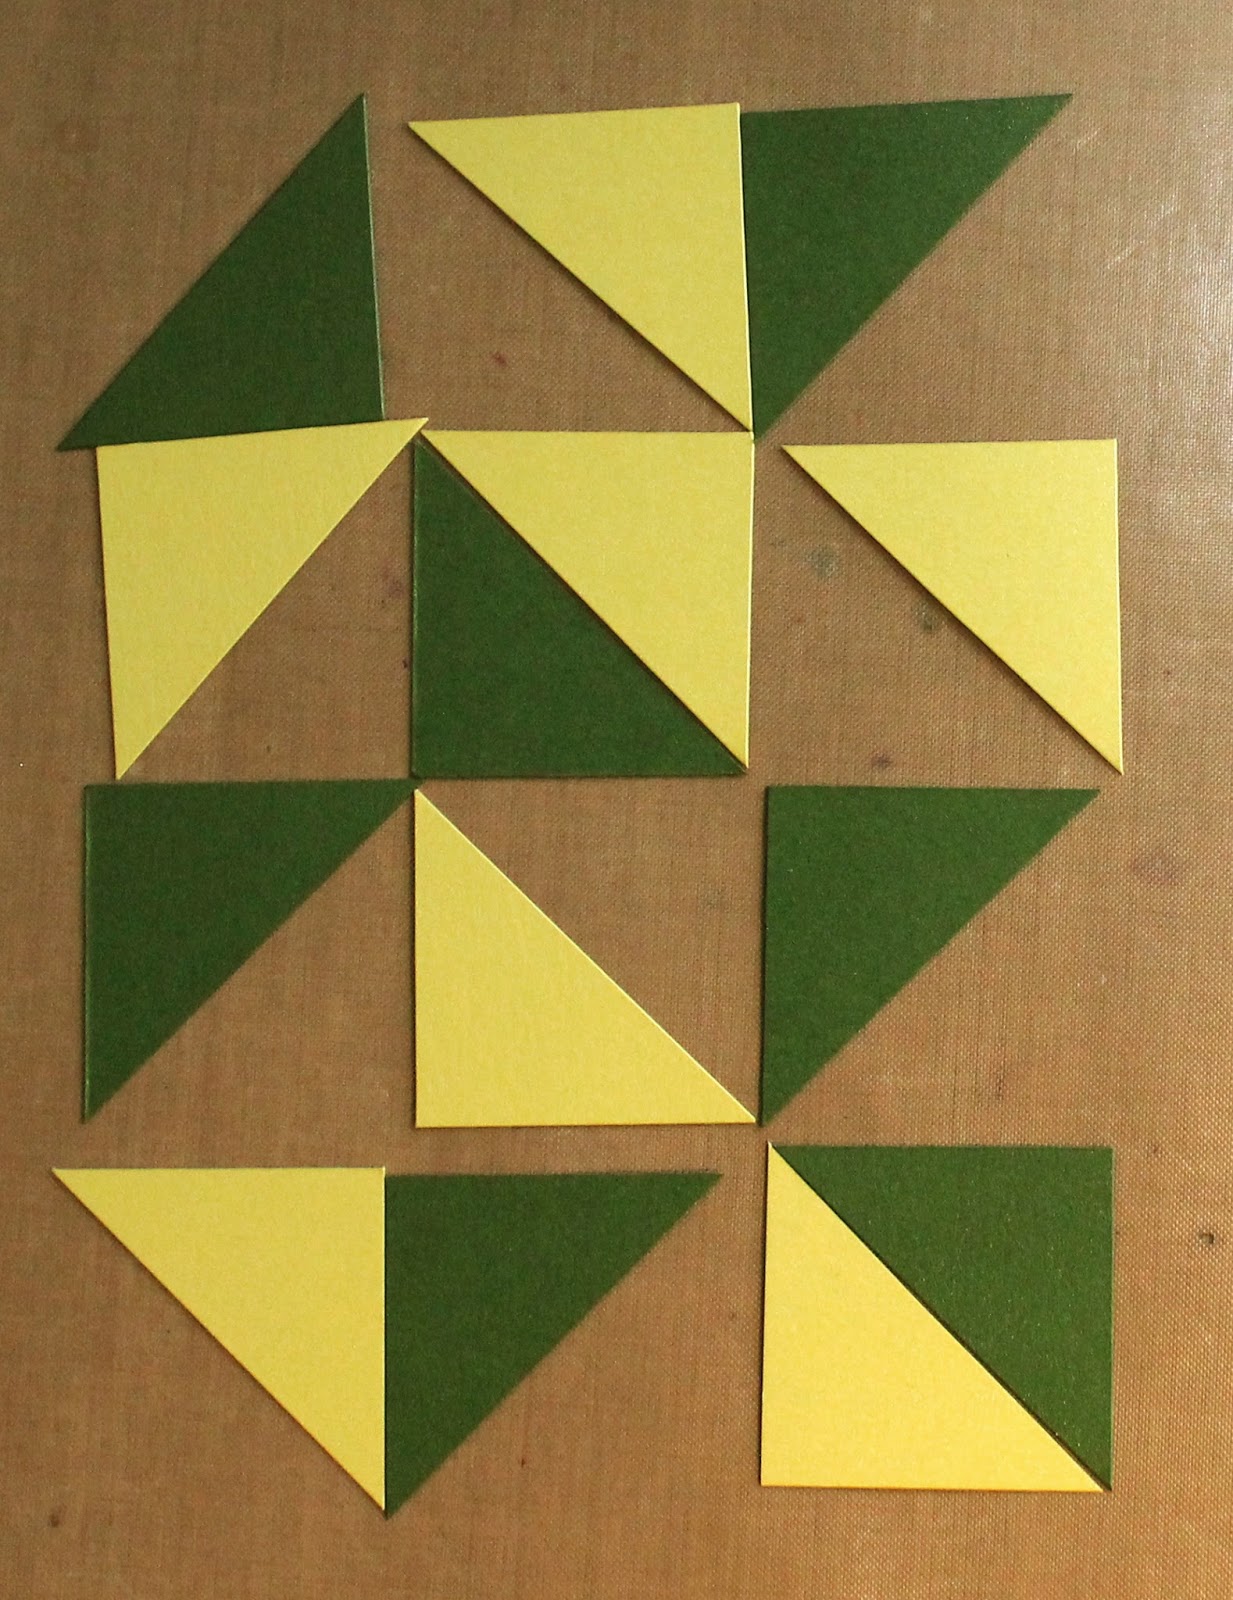
After that I laid them out the way I wanted them. Originally I was going to do a tall card and laid them out like that in the photo, and only after I glued them on and was deciding where to put my sentiment did I decide to rotate it into a long card. *Sigh* That always happens to me. Rarely do I know exactly how a card will go from start to finish. But of course that is the fun part! Thank goodness the triangles still looked good when I rotated it. Whew!
Ok, next I trimmed a long strip of translucent paper (vellum) at about 1 1/4 inches. Enough to fit my sentiment on with good spacing. I sponged it with some green ink using an applicator. This was necessary because with the green motif, the whiteness of the translucent paper was just too intense. It needed to be muted a bit. Also, just a side note, I have been looking EVERYWHERE for translucent paper and it hasn't been easy to find. CutCardStock.com translucent paper is great! (They have lots of different kinds) And it's in stock! So that just makes it that much more great, right? I get tired of running around looking for the things I need. It's nice to know CCS has what I need all the time! Thank you CCS!
Next, after stamping my sentiment on the strip, I adhered the strip by using runners tape on the edge and wrapping it around the top flap of the card base. It's an easy way to hide it. If you want to go the extra mile, you can put a piece of paper on the inside flap to cover the vellum strips altogether. I didn't do that because I don't mind seeing a bit of the making of a card as long as its not messy.
And there ya have it! Of course there were enamel dots used in this project too, because I just can't not use them. I used a variety of light and dark green. I also put two triangles in the corners of the envelope to tie it to the card. A nice little touch for a thank you note!
You can see the shimmer in the papers in this photo. It's just glorious to behold! Thanks so much for joining me today. I hope you learned something new and enjoyed your time. I definitely did.
Be sure to check out the store to see what deals are going on for the month of March. I know there is a lot of green in your future ;)
Until next time,
xoxo
k
Products used in this project:


Kristie, I really love this card! It looks like it would be so complicated, but thanks for sharing.... it looks like something I want to try. Love these shades of green!
ReplyDeleteThis is GORGEOUS!!! I LOVE the fun way you cut all the papers--and the shine is phenomenal! HUGS! :) Mynn xx
ReplyDeleteSo pretty!!
ReplyDeleteOh so pretty. .thanks for showing us how to make this
ReplyDeleteThanks so much ladies! Craft away!
ReplyDelete