Good Morning
CutCardStock.com fans! It's
Kristie Larsen here and I am sad to say, this is my very last post for CCS! I have been so blessed to have the privilege to design for
CutCardStock.com for the last year and I am sad to go! But I am excited to share with you one last project. This month we are focusing on home decor and it has been so much fun to create for. The DT has had some wonderful decor inspiration this month!
Today I want to show you a bunting that I made. I have now used it in two different places in my house and I can see how it is going to get a lot of mileage in the years to come.
I started with some Linen Cardstock and die cut it into bunting triangles. I wanted to have a big bunting, or a few smaller sized ones, so I die cut a lot of paper. My entire package actually! I wanted to try a watercolored look to them. I love the life and texture water-colour gives because of the intensity of color combined with more 'watery' spots.
I smeared some distress ink onto my craft mat and spritzed it with water until it was nice and wet and then I rubbed the die cut triangle in the water-colour until it was covered, but splotchy on both sides.
Since I wanted a lot of bunting, I did about 8 of each color. you can see they are splotchy and watercolory, which is just how I wanted them. My hands got quite messy but the work was fast. I just laid them out to dry on the floor in my craft room and in a matter of minutes they were done.
Next I took this embossing folder and ran each triangle through my Big Shot. It fit two triangles at once which made it fast work too.
Whew! I love the texture of these folders! Isn't it amazing? You can see how the embossing and the splotchiness of the water-colour really give it some fun dimension.
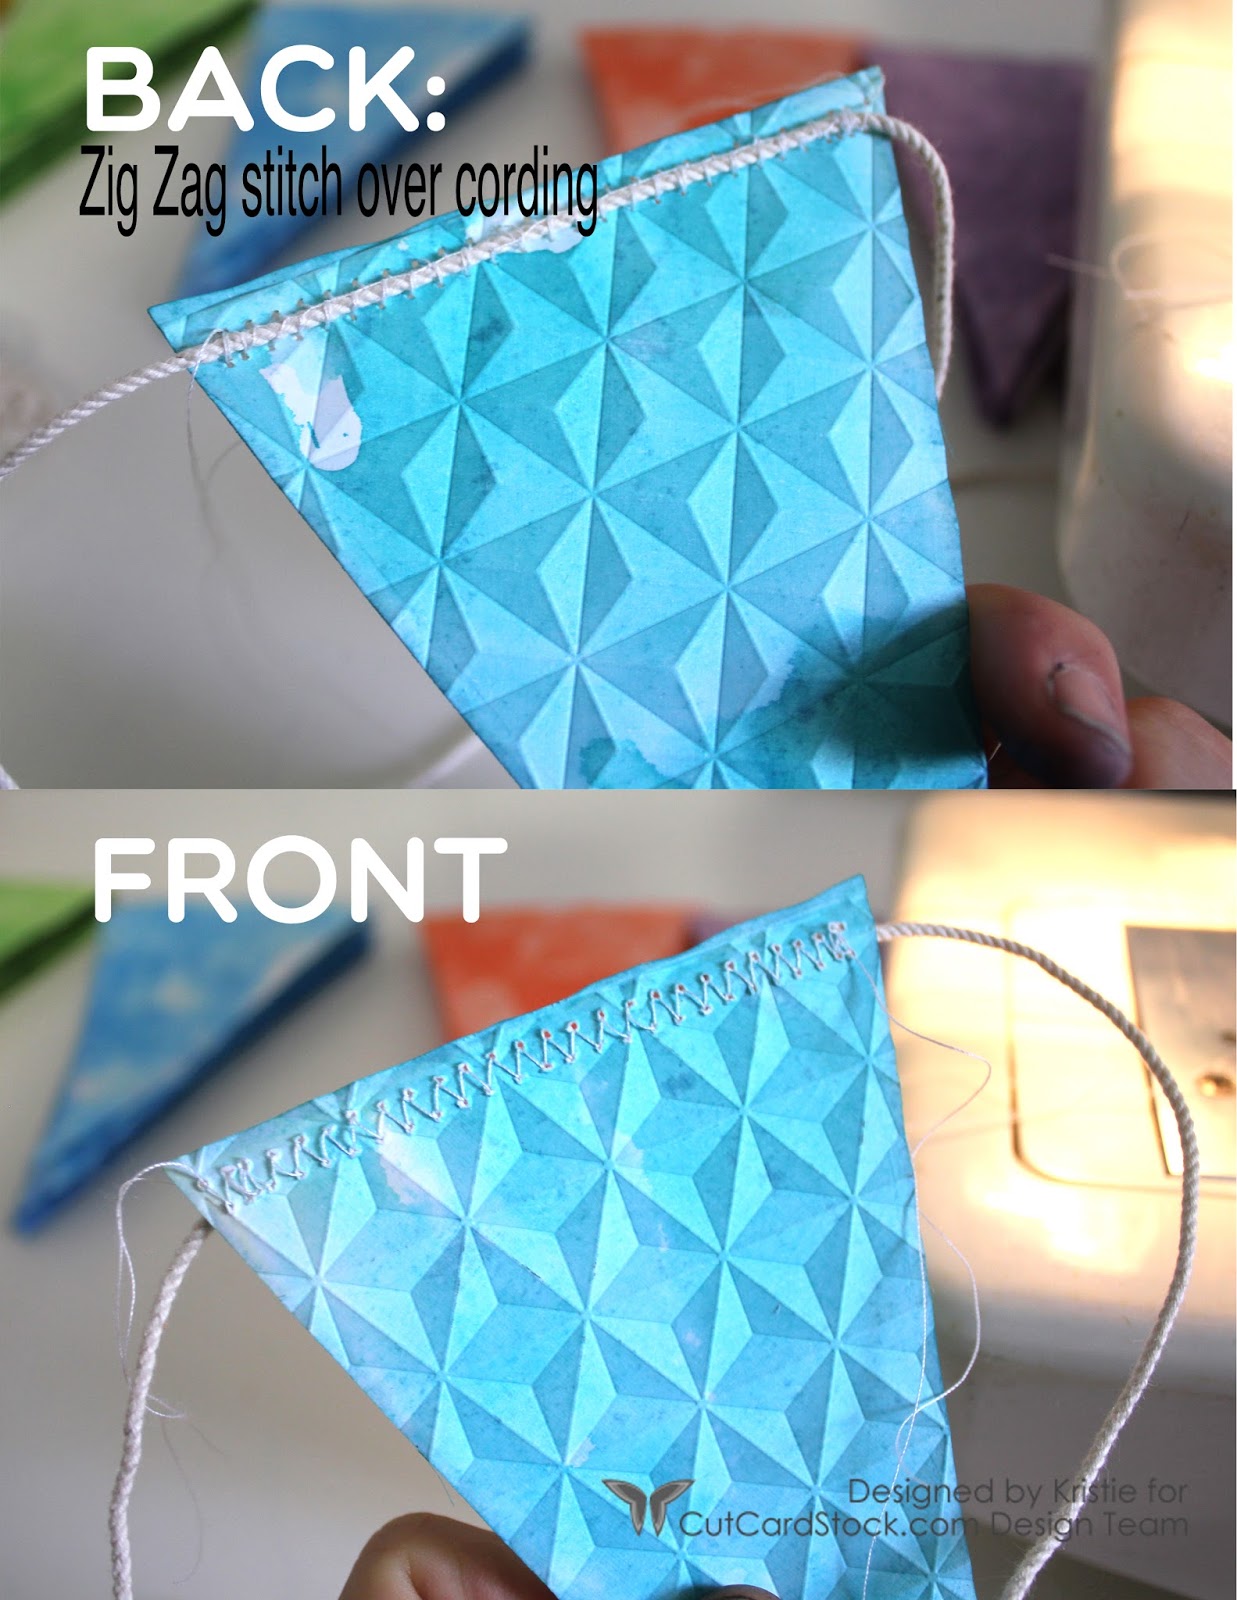
Because I want this to last awhile, I chose to sew the triangles onto this rope cording. I knew glue wouldn't have the holding power I was looking for. I chose a zigzag stitch and you can see on the back side how the stitch went right over the cording to keep it in place. I made sure to stitch some of the cording at both ends so it wouldn't budge. Gives it a nice finished look.
Once I was done I had three large strands of buntings.
I first strung them up for my son's birthday party out in our bbq area. It made the whole place so fun and exciting for his party! But I didn't want them there long term so I moved them to a different place in the house which is originally what I created them for....
Our reading corner! I have been wanting a reading corner for say, like... 11 years?! And finally I made one! I purchased a rug at Ikea and made up some pillow covers for some old floor pillows we have. The bunting was just the perfect touch to make this place extra special. I know its a stereo type to say boys don't like to read, but it has kind of been true in my family. I wanted to make a place that they were comfortable in and excited about. I love how the bunting makes it a special place. My kids absolutely love it!
I'm excited that I can use this bunting for just about anything! Parties, bedrooms, doorways, you name it! And since I have three strips I can use them in multiple places without having to take them down. I really think they are one of the most versatile home decor projects you can make!
Thanks for joining me today and for all the fun I have had in the last year! CutCardStock.com has been so amazing and has so many wonderful things in store for you. Don't forget to check out the specials going on this month and I hope you have a wonderful day. And Happy Crafting!!
xoxo
k
CutCardStock.com products used in this project:


Oh how I love these!
ReplyDelete