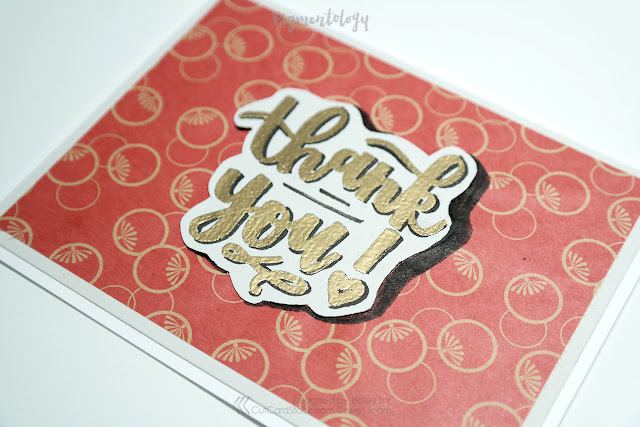
Hello and welcome! Today we're making some thank-you cards using origami patterned paper.
Using a square of Royal Sundance Linen 80lb card stock in Gray, I used a Ranger Embossing Pen
Don't forget to check out the video tutorial for the full process!
Then I covered the ink with Ranger Embossing Powder, Princess Gold
Once the powder is good and melted with my heat tool I decide to go ahead and assemble the front card panel. I trimmed a piece of origami paper to fit on a piece of Royal Linen Cardstock, which I adhered first with my ATG.
I mounted the origami paper and made sure everything was centered before moving on to detail the sentiment. I added a shadow to the text with a Tombow Fude Brush Pen
The sentiment was adhered with some tombow mono aqua glue .. in hindsight I would recommend using an ATG or some other dry adhesive, as this wet adhesive made the origami paper buckle once dried.
Finishing touch was to add a shadow to the sentiment bubble with my pentel pocket brush pen
For the next card, I used a “cheers!” wood stamp I found in the dollar bin at Michaels and stamped it onto a square of linen cardstock with versamark. Once I covered that with clear embossing powder and knocked off any powder I didn’t want, I heated it and melted all the powder before starting on some ink blending.
Using Mermaid Lagoon and Lucky Charm distress inks for an embossed resist look, I added some water droplets and soaked them up to distress the paper a bit. To grunge it up more, I brought in some Vintage Photo. First blending a bit, then taking the whole ink pad and swiping it to embellish the linen paper texture.
I wasn’t quite sure how I wanted to lay this card out, so I started with the origami paper I wanted to use and went from there. I trimmed the paper, and the sentiment as well, so I could mount it onto some more linen card stock. I used some more Vintage Photo to distress the linen card stock. I also swiped it around the outside of the sentiment square, just to add more depth to the layers.
I then realized I only wanted to use a smaller strip of the origami paper, so I cut it down and arranged things until I figure out a good solution. I cut some ribbon ends into the paper strip that I would be mounting behind the sentiment square. Then, I decided to carefully blend some vintage photo in from the sides. The paper is very thin, so I had to go quite slow.
Once I was happy with the layout, I decided to add some splashes of Gold
Thanks so much for staying tuned and I'll see you all next time!
- Haley
www.pigmentology.com
Instagram // Facebook // Etsy // Youtube


No comments
Thank you for visiting the CutCardStock blog! We appreciate your comments.