

5 Tips for Proper Envelope Addressing
As a professional calligrapher, a large percent of my job consists of envelope addressing for formal events. With over fifteen years of experience and having addressed literally thousands of envelopes, there are several questions about addressing which come up time and time again. Below are a few tips to help you create your guest list and a few tricks I've learned along the way which may save you some time and heartache.
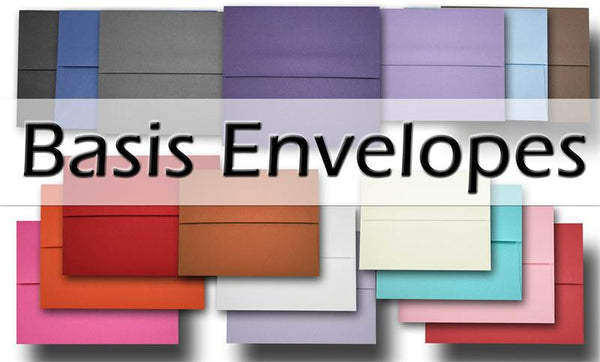
1. Choose the right envelopes.
For formal invitations, the envelope paper should match the invitation color and texture; however, there is a trend right now where colored or otherwise complimenting envelopes are being used. If selecting envelopes off the grid, choose a good quality envelope keeping in mind the type of addressing being used (hand calligraphy, hand scribed or printed from a computer). Make sure the envelope is compatible with the ink and/or equipment necessary for the job. Many hand-made envelopes have loose fibers that drag and pull in a calligrapher's nib causing the ink to run. Cut Card Stock has a multitude of envelopes suitable for quality envelope addressing. Be sure to check out their inventory.


The above envelopes are from Cut Card Stock. They are Curious Metallic Chocolate
2. Order at least 10% Extra.
Envelope addressing, whether done by hand or on a computer requires a waste factor. Check with the person doing the addressing prior to ordering envelopes, but generally 10% works well. It is always less expensive to order more envelopes than you need rather than having to order a small amount later to complete a job.

An unmarried couple (or friends or relatives) living together can go on same envelope. The female generally goes first.
3. Prepare a Proper Guest List.
With numerous books and Web, there is no excuse for not following proper etiquette rules; however, there are lots of resources other there with incorrect information. Try to use a reliable source for etiquette questions and just because you've seen it a certain way doesn't mean it is correct. My favorite resources include "Crane's Blue Book of Stationery", Emily Post's Wedding Guide", and "Protocol - The Complete Handbook of Diplomatic, Official and Social Usage". Here are a few tips in creating a proper guest list:
- Spell everything out - Drive, Avenue, Apartment, Post Office Box, Doctor, Reverend, etc.
- Use period after Mr., Ms., and Mrs.
- Spell out "and"
- Middle initials aren't generally used in formal addressing unless it begins the name: (J. Andre)
- Include suffix: Jr., Sr., III, etc. put a comma before suffix. Jr., and Sr., can be abbreviated; however, if written out a lowercase j or s is used.
- If using a single, outer envelope, include "and guest" or "and family" on outer. If using double envelopes, this would be put on the inner.
- Put guest with professional title first: if wife is a Doctor, put her name on first line and spouse on second line. (Do not use Mr. and Doctor)
- Spell out numbers under Thirty if space provides (Twenty-seventh Avenue South)
- Be sure to properly address envelopes going out of the country. There are different rules for different countries.
- Alphabetize your list -- it will save lots of time if you have to find an envelope.
- e-mail me if you have a question on etiquette!!! I'm happy to assist! kpodorsky@gmail.com

Cut Card Stock has lovely Savoy100% Cotton Envelopes, and 100% Crane Lettra suitable for formal
envelope addressing. They have various sizes and traditional colors.
4. Allow adequate time for addressing & Consider hiring professionals.
I understand there are a million things to do and think about when planning a formal event. Sadly, envelope addressing is something many people don't think about until their envelopes are in their hands. If you're desiring hand-calligraphy book your calligrapher at least 6 months prior to the wedding. If the guest list is exceptionally large, book 8 to 12 months in advance. I have to turn down jobs frequently because I'm contacted too late. Have your calligrapher keep the extra envelopes until after the wedding. Returned envelopes, changes of addresses and last-minute guest add-ons are very common. I usually keep a few sets of invitations and postage for each client in the event they need me to mail out a few after the rest have gone out. Hiring a professional to address your envelopes may also help ensure correct etiquette and free up your time to do other pre-event preparations.

If using small envelopes, hand-addressing looks better if using shorter (familiar) names
rather than long (formal) names

"and Guest" can be put on out envelope if inner envelopes are't used
5. Stuff, Sealing and Stamping.
Most stationers will provide a proper diagram for stuffing your envelopes. If they don't, refer to one of the resources listed above for guidance. Be sure all text is facing the same direction and each piece in the suite is layered smallest to largest. Do not put the reply card inside the reply envelope. Instead, tuck it under the flap and place the address reply envelope atop the invitation with the flap facing out. Be sure to put return postage on the reply envelope except for those going out of the country.
The best way to seal outer envelopes is with glue sticks. Simply run the stick over the envelope glue once or twice and firmly press closed. Remember to only seal outer envelopes - never the inners.
Postage can be a nightmare, so purchase stamps early! The most important thing to remember is to take a stuffed envelope to the post office to be weighed and measured. It is imperative to have the envelope measured because so many are considered "large envelopes" because they exceed the 6.125" width. If considered "large", the base price for postage starts higher than a standard letter size envelope. Don't assume the envelope will take regular postage. Don't be afraid to use multiple stamps on the envelope. In fact, many clients find this to be desirable and a way to color coordinate with the invitation. Check with your local post office to see if they offer hand-cancelling. This will prevent the large stripe sometimes seen on mail that has been machine cancelled. The envelopes will most likely have to go through sorting machines, so do expect there to be some sorting marks or stickers even if hand-cancelled.

These envelopes were hand-cancelled.

The average mail out for wedding invitations is 4-6 weeks prior to the event. If the wedding occurs during a major holiday, 8 weeks is the norm.
I hope you enjoyed this post and learned a few tricks of the trade. As always, I'd love to hear from you with your questions or comments.
All the best,
Kathryn


Wonderful information. I dream of being able to write like that! One day I will invest in left-handed calligraphy lessons! ;)
ReplyDeleteThank you Gloria. With all your talent, I know you'll be able to master it -- even as a leftie!!!
ReplyDeleteHugs,
kathryn