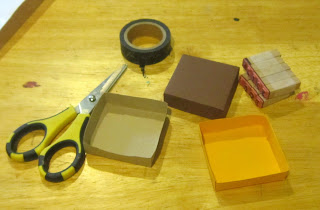
These are tiny little boxes, only 2 inches square, but you can make them larger (or even smaller). Each box will need a 6 inch square for the box, and a 3 inch square for the lid. I'd recommend nothing heavier than a cover weight a paper.
Fold each 6 inch square in thirds (2 inches in) from each side, making a 9 grid of folds.
Line up each of the 4 corners at the 2 inch fold and slice them off.
On each 3 inch square, fold in 1/2 inch at each side, and then use scissors to clip in 1/2 inch on the ends, as in the picture.
Using your favorite adhesive--THESE from CutCardStock all work great for this--glue the 1/2 inch tabs to the inside of the little lids, as shown in the photo. (Okay okay okay, it's fair to interject here and say that if you'd like to stamp or emboss or even collage on the little boxes or lids, you should do that prior to assembling the lids and boxes!
For the boxes, simply fold in each snipped off corner, bringing the pre-creased edge to the adjacent pre-creased edge. There's no glue involved, and you don't need to add ribbon or twine to keep it shut--the lid will keep the box closed.
These are fun to make, and it's easy to construct LOTS of them at once. Mixing and matching the lids adds a little extra touch, too. As you probably already know, ALL the orange, brown (including kraft brown), and gold cardstock is on sale this month at CutCardStock.
Add Autumn and Halloween embellishments for a Spooktacular one of a kind box!
And PS, the answer to the question posed in the first paragraph: VERY pretty, very elegant.


No comments
Thank you for visiting the CutCardStock blog! We appreciate your comments.