

Hello, everyone! Samantha here and I'm excited to share my latest card tutorial with you all.
To begin I used two white cardstock panels, the bottom panel cut to 4” x 5-1/4” and the top panel cut to 3” x 4-3/4”.
Using temporary adhesive I adhered the top panel to the bottom and did some stamping across both panels together.
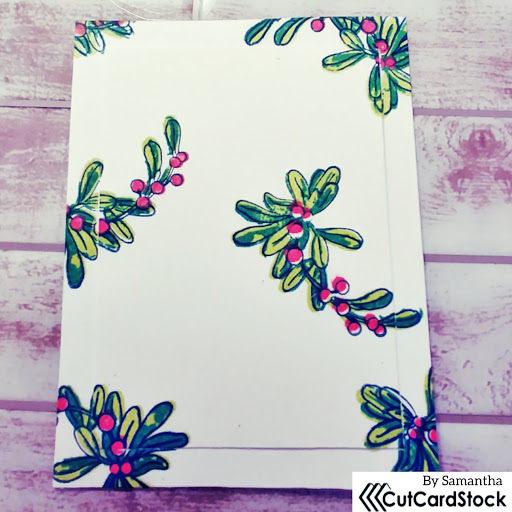
That gave me this.

I then broke the bond created by the temporary adhesive. Here you can see that the bottom panel has a border that was created by stamping the two panels as one.

I then used a basic word die and the Bazzill mirrored cardstock in Rose Gold
to die cut this sentiment.

Then, using the same die, I die cut the sentiment from the lower left of the top panel,
being careful to save the negatives.

Next, I adhered a piece of white cardstock measuring 2-3/4” x 4-1/2” behind my top panel.

I glued the rose gold die cut into place and then laid the negatives into place.

I stamped and heat embossed a holiday sentiment onto a small strip of red cardstock and then adhered that above the die cut.

I attached the bottom panel to a red A2 card base that matches the red cardstock of the sentiment strip.
Finally, I glued a rectangle of craft foam to the back of the top panel and placed that on top of the bottom panel, carefully lining up the stamped images.

That's it! I hope that you liked my card. Thanks so much for stopping by to take a look.
See you soon!
~Samantha


No comments
Thank you for visiting the CutCardStock blog! We appreciate your comments.